How to Install a Bathroom Vanity: A Step-by-Step Guide with Tips and Tricks
Looking to remodel your bathroom? A vanity is a great way to create a new look with ease. In this blog, we'll walk you through the essential steps to successfully installing a DakotaTM vanity. Let's start by gathering the essential tools for a successful project.
DakotaTM has a variety of bathroom vanities for every home aesthetic. With a variety of modern finishes, you can get the elegant Monroe vanity or the rustic Barndoor vanity in the perfect size for your bathroom. See the following instructions to learn how to install your DakotaTM vanity.
What's Needed to Install your Vanity?
- Level, stud finder, tape measure, and marking tool
- Philips screwdriver, #10x2-1/2" installation screws, and drill with 3/32" bit
Note: We recommend installing the new vanity with two people, especially when removing/installing the vanity base and top.
If Remodeling, First Remove Your Existing Vanity
The first, essential step to removing an existing vanity is to turn off the water supply and to disconnect the water lines. You must additionally remove the drain trap, placing a bucket underneath to catch water.
You are now able to remove the existing bathroom vanity. Before you remove anything, cut all caulk joints around the vanity top, this will ensure easy removal. First remove the sink bowl and faucet, if detached from the vanity top, then remove the vanity top. Note: there may be clips or brackets holding the top to the base, look underneath and remove as necessary. Removing these should grant you enough access to easily remove the vanity base.
When removing the base, look to determine how it is attached to the wall. Often, it will be fastened to the wall with screws driven through a mounting strip in the back of the cabinet into wall studs. Remove necessary fasteners and detach vanity base from the wall.
Depending on the size and style of the replacement vanity, you may need to repair holes in the wall and paint. Now is a great time to do so.
Attach New Vanity Base to the Wall
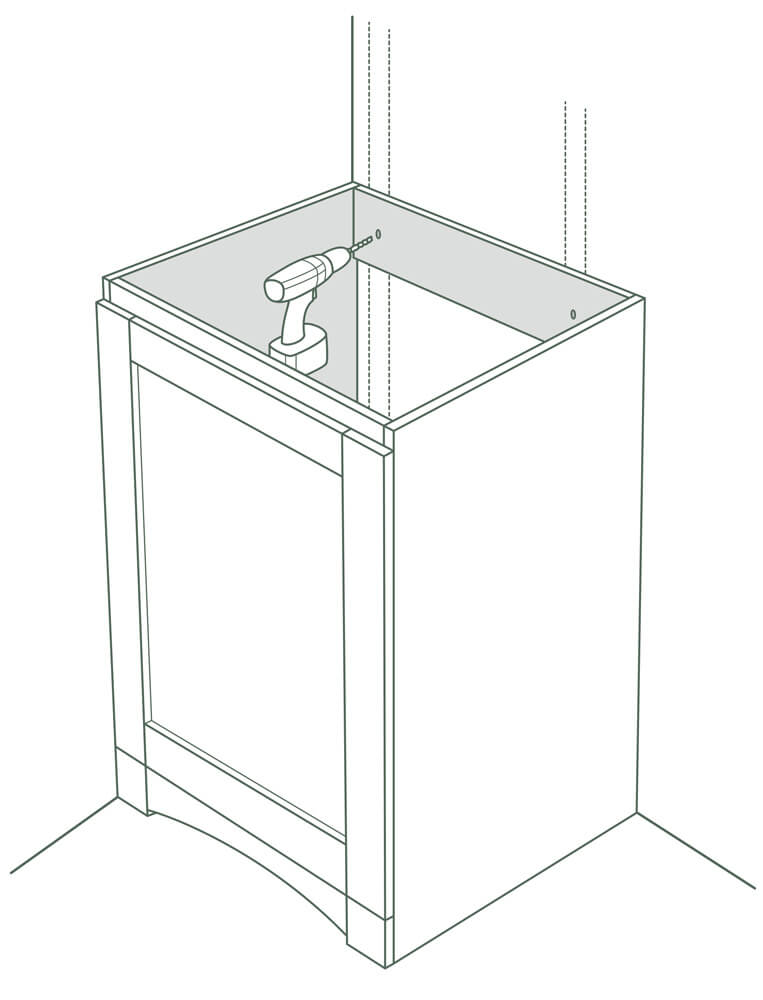
First, plan and prepare before installing the new vanity base. Ensure you have all the needed tools to complete installation, then measure for the new vanity base width, height, and depth and mark the wall accordingly. Identify where wall studs are with a stud finder. Be aware of the existing plumbing and place your vanity accordingly, DakotaTM vanities have an open back for versatile installation around existing fixtures.
Once marked, slide your new vanity base into position, lining up with the marks you made in the previous step. Ensure that the top is level and drill a pilot hole through the cabinet back braces in the locations that you marked a wall stud with a minimum of a 3/32" drill bit. Make sure holes come no closer than 2 inches from any inside edge.
Insert the #10x2-1/2" installation screws into the holes and tighten securely, ensuring the screws are seated properly into the wall studs. At least one screw should be placed into each wall stud. If you are unable to find two wall studs, screw the first into the wall stud and screw two more into the drywall, securing them with drywall anchors.
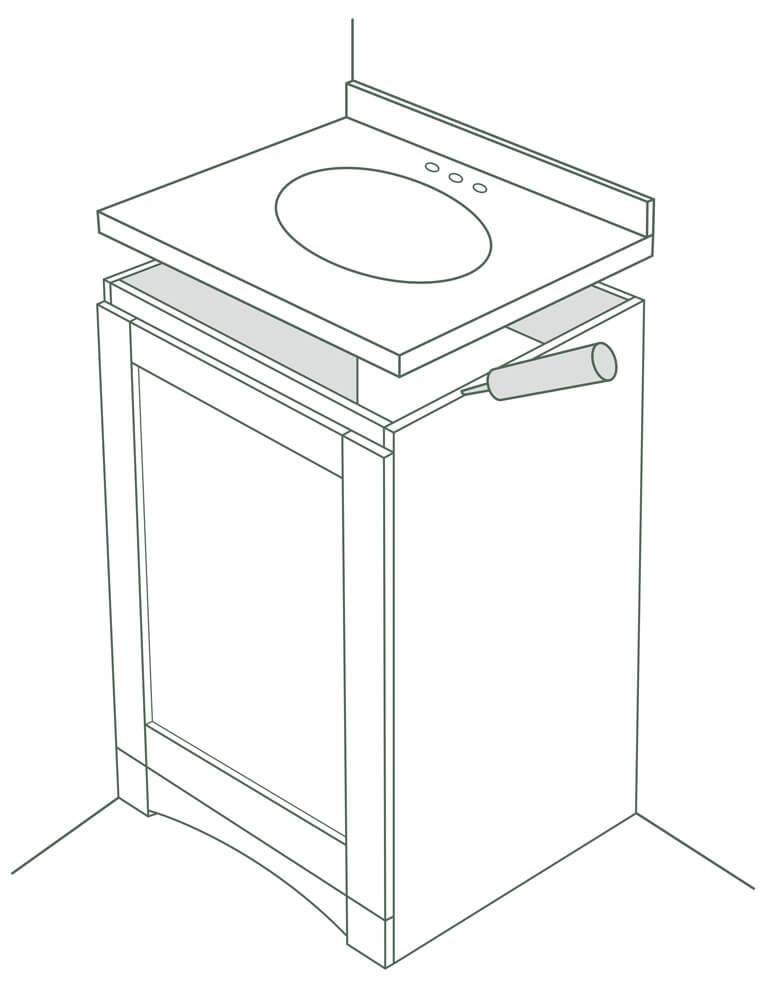
Install the Vanity Top
Find a vanity top at Menards that coordinates well with your new DakotaTM vanity. Follow the vanity top manufacturer's instructions for the most successful installation. Note: any DakotaTM vanity base supports a maximum weight limit of 200 lbs. Exceeding this weight limit will compromise the integrity of the cabinet structure and could cause the cabinet to fail.
Install the new bathroom faucet according to the manufacturer's instructions.
Apply a thin bead of silicone compound around the vanity base and set the vanity top carefully in place. Remove any excess silicone compound with a wet rag.
Apply a bead of caulk around the vanity top, wherever it meets the wall, use a finishing tool or a finger to push the caulk into the gap and smooth the top.
Completing the Project
Reattach the water lines to the new faucet, reattach the drain trap, ensuring everything lines up. Once you have ensured everything is properly attached, you are able to turn the water back on.
Adjust door hinges as needed horizontally and vertically.
Finish your vanity installation by adding decorative trim in coordinating DakotaTM finishes for areas the vanity is not flush with the wall or for added style. Inside corner, outside corner, and quarter round profiles available in coordinating colors.
Stock with essentials and enjoy. DakotaTM vanities provide ample storage for cleaning products, disposables, toiletries, towels, and more in a matching, finished interior.
Cleaning and Care
To clean the surface of the doors, shelves, or cabinet base, use non-abrasive cleaners and/or cleaning agents that do not contain solvents. Avoid using abrasive cleaners as they will damage the surface.
For the longest vanity life, ensure your bathroom has proper ventilation to prevent drastic, prolonged fluctuations in temperature and/or humidity. Note: the vanity base has a maximum weight limit of 200 lbs. Keep this in mind when placing items on top of the vanity.